1.6 Setting up Your Workspace
Your work space in the LANSA Editor is very flexible. You can control your work space to suit what you are doing.
As well as setting up your work space, you can choose to change specific behaviors via the LANSA Settings. At the beginning, the selected defaults will probably suit you best but it is recommended that you become familiar with the time-saving options that are available.
If you have made some changes to the Editor's work space and wish to return to your original layout, press the Reset Editor button on the LANSA Setting's dialog.
When you first install Visual LANSA, the Editor will look something like this:
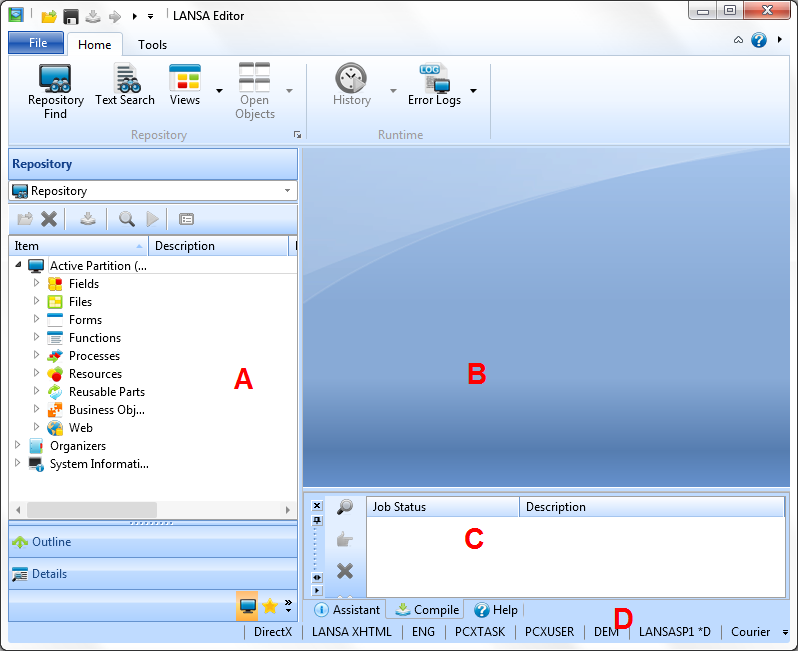
The Editor's window, by default, contains these main areas:
A - Left pane. This is a tab area and is, generally, used to locate information and objects. Also in this area is the Details tab that you use to work with objects in the LANSA Repository.
B - Center pane which is the main work area and displays the currently opened object. You cannot close this center pane, change the location of its tabs or change its location.
C - Bottom pane. This is a supplementary work area, which is used for reporting the status of activities, such as compiles, as well as displaying Help text and the Prompter.
D – Status bar. The status bar shows active settings for the IDE. These settings are specified in the LANSA Settings dialog, but you can change some of them directly by clicking them in the status bar. The contents of the status bar are customizable:

There are a number of ways to rearrange, resize and close these areas and these are described in 1.6.2 Editor Tabs,1.6.3 Quickly Resize Tabs and 1.6.4 Autohide.
For further information about the use and default contents of the editor, refer to Editor Basics and Editor Tabs in this guide.
Also See
Ý 1. Getting Started with Visual LANSA